
如何在 Blogger 和 WordPress 中添加響應式 HTML 表格
已發表: 2022-05-19表格是向讀者展示系統數據的好方法。 它可以幫助他們更輕鬆地理解主題並更輕鬆地消化內容。
這就是為什麼您需要將 HTML 表格添加到您的 Blogger 和 WordPress 網站的原因。 但是,並非所有表格都是移動響應的,尤其是當您插入多行和多列時。
為了解決這個問題,我在本文中給出了兩個響應式 HTML 表格代碼,您可以在您的 Blogger 和 WordPress 網站上使用它們。
您可以輕鬆複製代碼並複製表數據並根據您的要求進行修改。 您只需要學習 HTML 表格代碼的基礎知識及其工作原理。
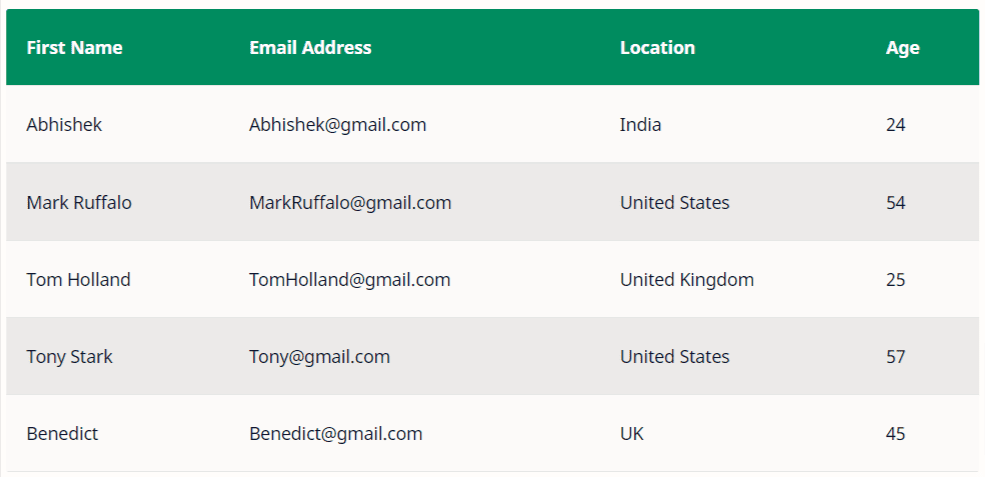
這是桌面設備中表格的外觀。 如果您在 Mobile 上看到此表,那麼您會看到它會根據您選擇的樣式以不同的方式加載。
我為移動視圖添加了兩種不同的樣式。 試試下面的 HTML 代碼,並隨意使用它們。
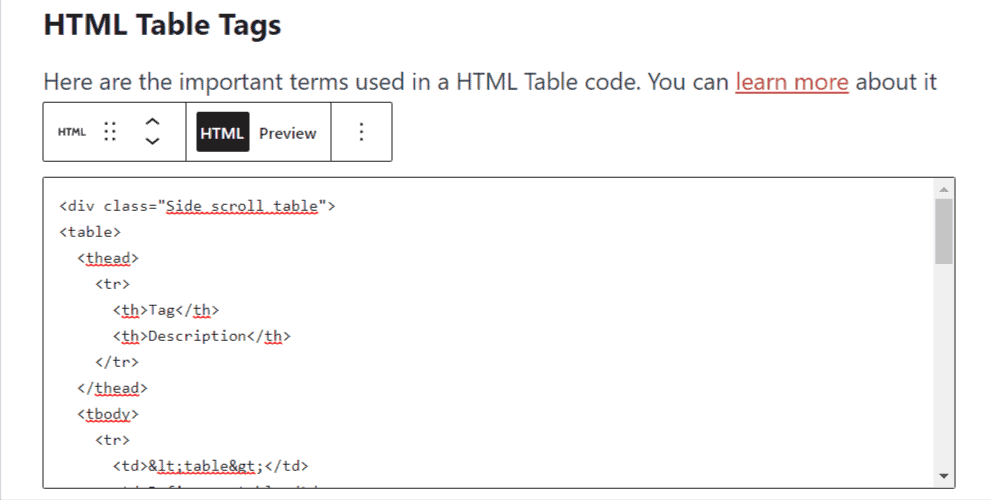
HTML 表格標籤
以下是 HTML 表格代碼中使用的重要術語。 你可以在這裡了解更多。
| 標籤 | 描述 |
|---|---|
| <表格> | 定義一個表 |
| <th> | 定義表格中的標題單元格 |
| <tr> | 定義表中的一行 |
| <td> | 定義表數據 |
| <頭> | 對錶格中的標題內容進行分組 |
| <tbody> | 對錶格中的正文內容進行分組 |
HTML 表格代碼 (Style-1)
<table> <thead> <tr> <th scope="col">First Name</th> <th scope="col">Email Address</th> <th scope="col">Location</th> <th scope="col">Age</th> </tr> </thead> <tbody> <tr> <td data-label="First Name">Abhishek</td> <td data-label="Email Address">[email protected]</td> <td data-label="Location">India</td> <td data-label="Age">24</td> </tr> <tr> <td data-label="First Name">Mark Ruffalo</td> <td data-label="Email Address">[email protected]</td> <td data-label="Location">United States</td> <td data-label="Age">54</td> </tr> <tr> <td data-label="First Name">Tom Holland</td> <td data-label="Email Address">[email protected]</td> <td data-label="Location">United Kingdom</td> <td data-label="Age">25</td> </tr> <tr> <td data-label="First Name">Tony Stark</td> <td data-label="Email Address">[email protected]</td> <td data-label="Location">United States</td> <td data-label="Age">57</td> </tr> <tr> <td data-label="First Name">Benedict</td> <td data-label="Email Address">[email protected]</td> <td data-label="Location">UK</td> <td data-label="Age">45</td> </tr> </tbody> </table> <style> table {border-collapse: collapse;border-spacing: 0;margin: 2rem 0; width: 100%;} th, td {padding: 1rem 1.5rem; text-align: left;} th {background-color: #008c5f; /* header background color */ color: #fff; /* header text color */ font-weight: 600;} tr { padding: 0;} td {vertical-align: middle;} tr:nth-child(even) td {background-color: rgba(0, 0, 0, .075); /* striped background color */} @media screen and (max-width: 640px) { thead, th {display: none;} tr, td { display: block;} tr {border: 1px solid rgba(0, 0 , 0 ,.15);margin-bottom: 2rem;} tr:last-child {margin-bottom: 0;} tr:nth-child(even) td { background-color: transparent;} td {clear: both;text-align: right;} td:before { content: attr(data-label)': ';float: left;font-weight: bold;margin-right: 1rem;}} </style>HTML 表格代碼 (Style-2)
<div class="Side_scroll_table"> <table> <thead> <tr> <th>Name</th> <th>Email</th> <th>Location</th> <th>Age</th> </tr> </thead> <tbody> <tr> <td>Abhishek</td> <td>[email protected]</td> <td>India</td> <td>24</td> </tr> <tr> <td>Mark Ruffalo</td> <td>[email protected]</td> <td>United States</td> <td>54</td> </tr> <tr> <td>Tom Holland</td> <td>[email protected]</td> <td>United Kingdom</td> <td>25</td> </tr> <tr> <td>Tony Stark</td> <td>[email protected]</td> <td>United States</td> <td>57</td> </tr> <tr> <td>Benedict</td> <td>[email protected]</td> <td>UK</td> <td>45</td> </tr> </tbody> </table> </div> <style> .Side_scroll_table {margin: 1.5rem 0;overflow: auto;white-space: nowrap;} table {border-collapse: collapse;border-spacing: 0;width: 100%;} th, td {padding: 1rem 1.5rem;text-align: left;} th {background-color: #008c5f; /* header background color */ color: #fff; /* header text color */font-weight: 600;} tr {padding: 0;} td {vertical-align: top;} tr:nth-child(even) td {background-color: rgba(0, 0, 0, .075); /* striped background color */} </style>如何在 Blogger 中添加響應式 HTML 表格
要在 Blogger 中添加響應式表格,請按照以下步驟操作。

- 登錄到您的 Blogger 儀表板
- 在HTML 視圖中打開博客文章
- 現在復制上面的 HTML 代碼並更改值
- 現在將代碼粘貼到帖子編輯器中並發布博客帖子
現在,響應表已添加到您的 Blogger 網站。 您可以通過更改 CSS 代碼進一步自定義標題顏色、字體顏色和字體粗細。
如何在 WordPress 中添加響應式 HTML 表格
要在 WordPress 中添加響應表,請按照以下步驟操作
- 登錄到您的 WordPress 儀表板
- 打開博客文章並蒐索“自定義 HTML”塊。
- 現在更改給定代碼中的數據並將其粘貼到塊中。
- 現在發布博客文章。
現在 HTML 表已添加到您的 WordPress 網站。 您可以通過在移動視圖中打開表格來檢查表格的響應性。
結論
我希望您已成功地將響應式 HTML 表格添加到您的 Blogger 和 WordPress 網站。 如果您對此有任何疑問,可以在評論部分問我。
如果您喜歡此內容,請在社交媒體上分享並在 Twitter @key2blogging 上關注我們
閱讀更多:如何在 WordPress 中添加粘性頁腳廣告