
如何在 Blogger 中添加 WhatsApp 聊天按鈕(免費)
已發表: 2021-10-13WhatsApp 是目前廣泛使用的即時通訊平台之一,您可以在您的業務中利用它。 您可以通過 WhatsApp 輕鬆銷售您的服務和產品。
在本文中,您將了解如何將 WhatsApp 聊天按鈕添加到您的 Blogger 網站。
因此,在進行此步驟之前,讓我們了解在網站中添加聊天按鈕有什麼好處,以及您是否應該在您的網站上使用它。
好吧,根據eMarketer最近的數據,WhatsApp 目前在印度擁有3.901 億月活躍用戶,其次是巴西和美國。
因此,您可以利用這個即時通訊平台來發展您的業務。 因此,添加 WhatsApp 聊天小部件可以讓您的用戶輕鬆地直接與您聯繫,而不是發送電子郵件。
因此,如果您是 WordPress 用戶,那麼您可以通過添加插件輕鬆地在您的網站上實現此功能。 按照指南在 WordPress 中添加 WA 聊天按鈕。
在 Blogger 中添加 WhatsApp 聊天按鈕的步驟
要添加 WhatsApp 聊天小部件,請按照以下步驟操作。
步驟 1:登錄到您的 Blogger 儀表板並轉到主題部分。
第 2 步:現在進行主題備份,然後單擊編輯 HTML 選項。
第 3 步:現在搜索]]></b:skin>標記或</style>標記並將 CSS 代碼粘貼到其上方。
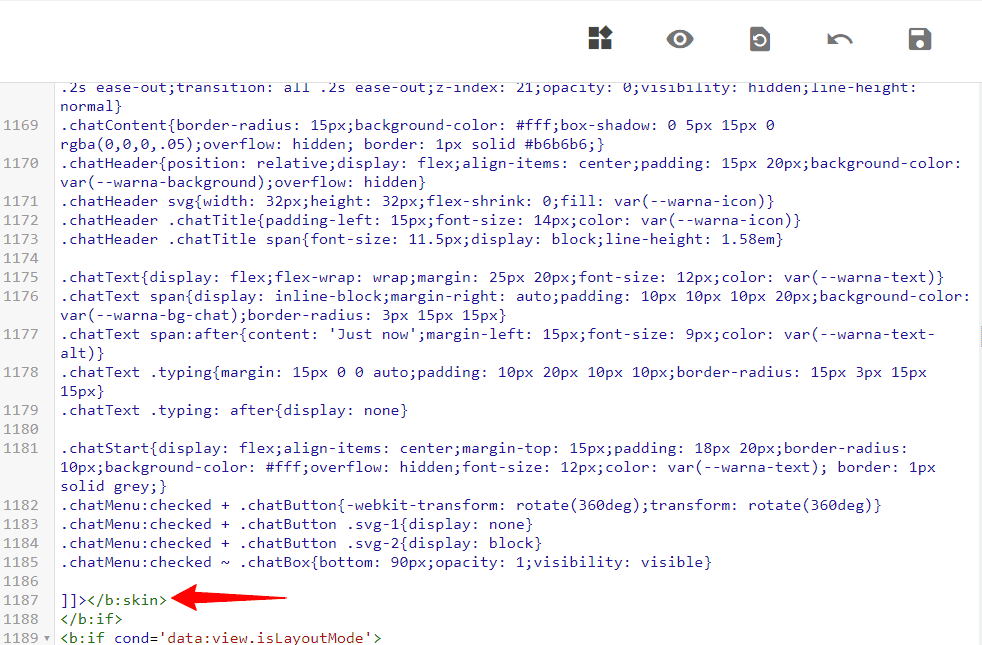
/* Chatbox Whatsapp */ :root { --warna-background: #4dc247; --warna-bg-chat: #f0f5fb; --warna-icon: #fff; --warna-text: #505050; --warna-text-alt: #989b9f; --lebar-chatbox: 320px; } svg{width: 22px;height: 22px;vertical-align: middle;fill: var(--warna-icon)} .chatMenu, .chatButton .svg-2{display: none} .chatButton{position: fixed;background-color: var(--warna-background);bottom: 20px;left: 20px;border-radius: 50px;z-index: 20;overflow: hidden;display: flex;align-items: center;justify-content: center;width: 50px;height: 50px;-webkit-transition: all .2s ease-out;transition: all .2s ease-out} .chatButton svg{margin: auto;fill: var(--warna-icon)} .chatBox{position: fixed;bottom: 70px;left: 20px;width: var(--lebar-chatbox);-webkit-transition: all .2s ease-out;transition: all .2s ease-out;z-index: 21;opacity: 0;visibility: hidden;line-height: normal} .chatContent{border-radius: 15px;background-color: #fff;box-shadow: 0 5px 15px 0 rgba(0,0,0,.05);overflow: hidden; border: 1px solid #b6b6b6;} .chatHeader{position: relative;display: flex;align-items: center;padding: 15px 20px;background-color: var(--warna-background);overflow: hidden} .chatHeader svg{width: 32px;height: 32px;flex-shrink: 0;fill: var(--warna-icon)} .chatHeader .chatTitle{padding-left: 15px;font-size: 14px;color: var(--warna-icon)} .chatHeader .chatTitle span{font-size: 11.5px;display: block;line-height: 1.58em} .chatText{display: flex;flex-wrap: wrap;margin: 25px 20px;font-size: 12px;color: var(--warna-text)} .chatText span{display: inline-block;margin-right: auto;padding: 10px 10px 10px 20px;background-color: var(--warna-bg-chat);border-radius: 3px 15px 15px} .chatText span:after{content: 'Just now';margin-left: 15px;font-size: 9px;color: var(--warna-text-alt)} .chatText .typing{margin: 15px 0 0 auto;padding: 10px 20px 10px 10px;border-radius: 15px 3px 15px 15px} .chatText .typing: after{display: none} .chatStart{display: flex;align-items: center;margin-top: 15px;padding: 18px 20px;border-radius: 10px;background-color: #fff;overflow: hidden;font-size: 12px;color: var(--warna-text); border: 1px solid grey;} .chatMenu:checked + .chatButton{-webkit-transform: rotate(360deg);transform: rotate(360deg)} .chatMenu:checked + .chatButton .svg-1{display: none} .chatMenu:checked + .chatButton .svg-2{display: block} .chatMenu:checked ~ .chatBox{bottom: 90px;opacity: 1;visibility: visible}第 4 步:現在搜索 </body> 標記並將 HTML 代碼粘貼到其上方。
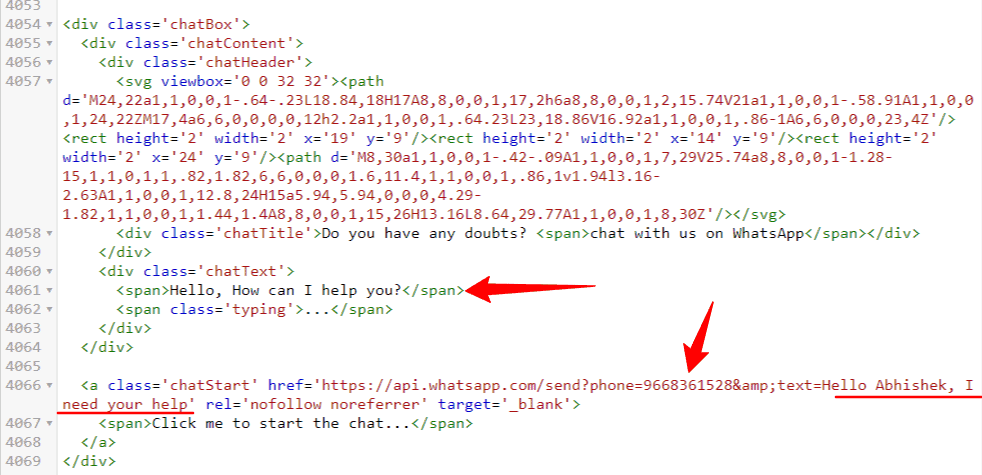
<input class='chatMenu hidden' type='checkbox'/> <label class='chatButton' for='offchatMenu'> <svg class='svg-1' viewBox='0 0 32 32'><g><path d='M16,2A13,13,0,0,0,8,25.23V29a1,1,0,0,0,.51.87A1,1,0,0,0,9,30a1,1,0,0,0,.51-.14l3.65-2.19A12.64,12.64,0,0,0,16,28,13,13,0,0,0,16,2Zm0,24a11.13,11.13,0,0,1-2.76-.36,1,1,0,0,0-.76.11L10,27.23v-2.5a1,1,0,0,0-.42-.81A11,11,0,1,1,16,26Z'/><path d='M19.86,15.18a1.9,1.9,0,0,0-2.64,0l-.09.09-1.4-1.4.09-.09a1.86,1.86,0,0,0,0-2.64L14.23,9.55a1.9,1.9,0,0,0-2.64,0l-.8.79a3.56,3.56,0,0,0-.5,3.76,10.64,10.64,0,0,0,2.62,4A8.7,8.7,0,0,0,18.56,21a2.92,2.92,0,0,0,2.1-.79l.79-.8a1.86,1.86,0,0,0,0-2.64Zm-.62,3.61c-.57.58-2.78,0-4.92-2.11a8.88,8.88,0,0,1-2.13-3.21c-.26-.79-.25-1.44,0-1.71l.7-.7,1.4,1.4-.7.7a1,1,0,0,0,0,1.41l2.82,2.82a1,1,0,0,0,1.41,0l.7-.7,1.4,1.4Z'/></g></svg> <svg class='svg-2' viewBox='0 0 512 512'><path d='M278.6 256l68.2-68.2c6.2-6.2 6.2-16.4 0-22.6-6.2-6.2-16.4-6.2-22.6 0L256 233.4l-68.2-68.2c-6.2-6.2-16.4-6.2-22.6 0-3.1 3.1-4.7 7.2-4.7 11.3 0 4.1 1.6 8.2 4.7 11.3l68.2 68.2-68.2 68.2c-3.1 3.1-4.7 7.2-4.7 11.3 0 4.1 1.6 8.2 4.7 11.3 6.2 6.2 16.4 6.2 22.6 0l68.2-68.2 68.2 68.2c6.2 6.2 16.4 6.2 22.6 0 6.2-6.2 6.2-16.4 0-22.6L278.6 256z'/></svg> </label> <div class='chatBox'> <div class='chatContent'> <div class='chatHeader'> <svg viewbox='0 0 32 32'><path d='M24,22a1,1,0,0,1-.64-.23L18.84,18H17A8,8,0,0,1,17,2h6a8,8,0,0,1,2,15.74V21a1,1,0,0,1-.58.91A1,1,0,0,1,24,22ZM17,4a6,6,0,0,0,0,12h2.2a1,1,0,0,1,.64.23L23,18.86V16.92a1,1,0,0,1,.86-1A6,6,0,0,0,23,4Z'/><rect height='2' width='2' x='19' y='9'/><rect height='2' width='2' x='14' y='9'/><rect height='2' width='2' x='24' y='9'/><path d='M8,30a1,1,0,0,1-.42-.09A1,1,0,0,1,7,29V25.74a8,8,0,0,1-1.28-15,1,1,0,1,1,.82,1.82,6,6,0,0,0,1.6,11.4,1,1,0,0,1,.86,1v1.94l3.16-2.63A1,1,0,0,1,12.8,24H15a5.94,5.94,0,0,0,4.29-1.82,1,1,0,0,1,1.44,1.4A8,8,0,0,1,15,26H13.16L8.64,29.77A1,1,0,0,1,8,30Z'/></svg> <div class='chatTitle'>Do you have any doubts? <span>chat with us on WhatsApp</span></div> </div> <div class='chatText'> <span>Hello, How can I help you?</span> <span class='typing'>...</span> </div> </div> <a class='chatStart' href='https://api.whatsapp.com/send?phone=9668362528&text=Hello Abhishek, I need your help' rel='nofollow noreferrer' target='_blank'> <span>Click me to start the chat...</span> </a> </div>第 5 步:現在更改 WhatsApp 號碼和預定義消息並保存代碼。

現在 WhatsApp 聊天按鈕將添加到您的 Blogger 網站。
觀看下面的視頻以直觀地了解這些步驟。

如何自定義 WhatsApp 聊天小部件?
好吧,您可以進一步自定義聊天按鈕的外觀和感覺,例如您可以更改按鈕顏色,在其中添加邊框和框陰影。
此處聊天按鈕放置在距離左側 20px 的位置,如果要將其更改為右側,則必須更改 CSS 代碼中的位置。
在這裡,您必須更改聊天按鈕 (.chatButton) 和聊天框 (.chatBox) 的兩個值。 在這裡你必須更改代碼左:20px; 至右:20px; .
結論
我希望這篇文章可以幫助您將聊天按鈕添加到您的博客網站。 如果您在此過程中遇到任何問題,您可以在評論部分詢問我或加入我們的 Telegram 組進行討論。
如需更多類似這樣的精彩教程,您可以訂閱我們的 YouTube 頻道Key2Blogging 並在Twitter 上關注我以獲取更新。