
如何在 WordPress 中添加作者信息框
已發表: 2021-11-18
您是否嘗試通過在 WordPress 中添加作者信息框來顯示您的作者信息? 作者信息框是一個小部分,可讓您顯示有關博客作者的信息並顯示他們的社交媒體資料。
WordPress 中有幾個主題可以讓您在默認情況下輕鬆顯示作者信息。 但是,您可能在某些主題中找不到它。
在這篇文章中,我將向您展示幾種在 WordPress 中輕鬆添加作者信息框的方法。
讓我們深入挖掘。
- 如何在 WordPress 中添加作者信息框
- 使用您的主題添加作者信息框
- 使用插件添加作者信息框
- 使用自定義代碼添加作者信息框
- 最後的話
如何在 WordPress 中添加作者信息框
有幾種方法可以在 WordPress 中添加作者信息框。 您可以使用您的主題、插件、自定義代碼等添加作者信息框。這裡我將向您展示三種方法。
使用您的主題添加作者信息框
許多 WordPress 主題在每篇文章下方都有一個作者信息框。 您可以使用此框顯示作者的簡歷。
為此,請導航到用戶 -> 所有用戶頁面。 現在單擊用戶的“編輯”按鈕。
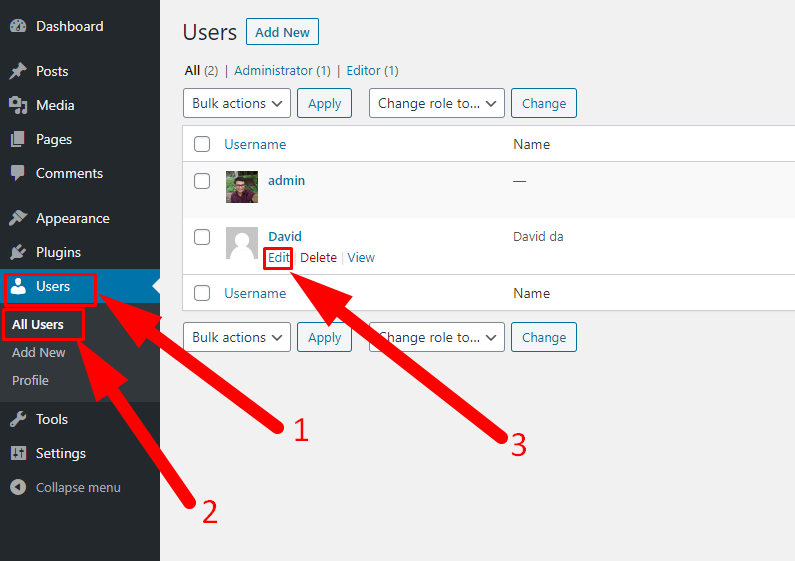
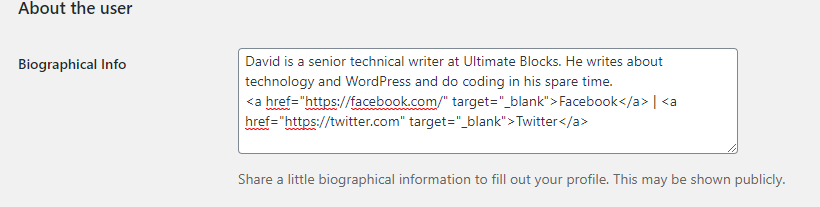
將打開一個新頁面,向下滾動到“傳記信息”部分。 在此部分中,添加作者的所有信息。 您還可以在此字段中添加 HTML 以添加鏈接。

如果作者沒有頭像,請告訴作者從 Gravatar 設置。 最後點擊更新的用戶,就可以在內容下方看到作者信息框了。
使用插件添加作者信息框
如果您使用的主題沒有作者信息框,那麼您可以使用此方法。 在這種方法中,您將需要一個名為 Author Bio Box 的插件。
安裝並激活插件,然後進入設置 -> 作者生物框頁面配置設置。
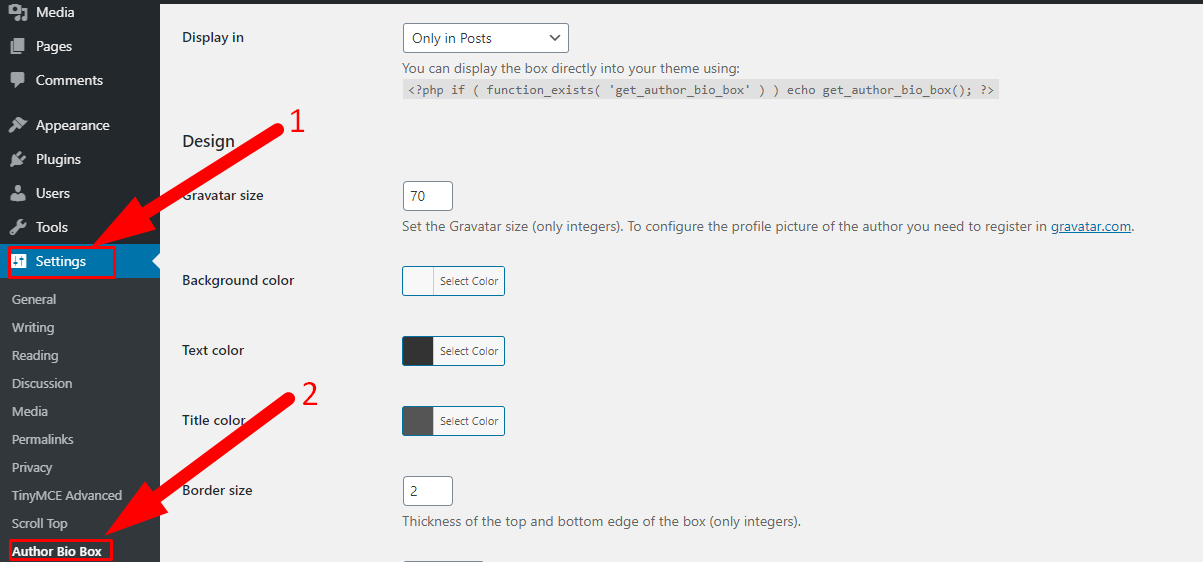
在此頁面中,為作者信息框選擇 gravatar 大小、顏色、位置並更改其他更改。 配置插件後,單擊保存更改按鈕。
現在轉到用戶 -> 所有用戶頁面,然後單擊要更改的用戶的“編輯”按鈕。
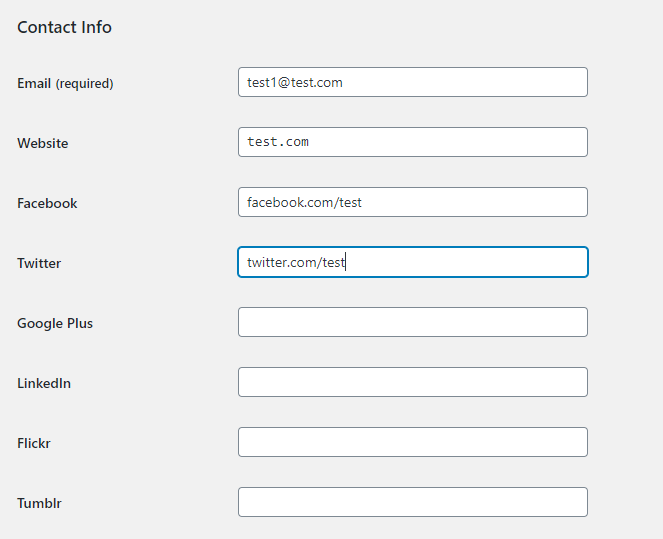
在這裡,向下滾動到“聯繫信息”部分並添加作者的所有社交媒體個人資料鏈接。 該插件只會顯示您輸入 URL 的社交媒體的圖標。
現在向下滾動到“傳記信息”部分並在此處添加所有作者的信息。 您也可以在此處使用 HTML 添加鏈接。
現在單擊更新用戶按鈕,您就完成了。
使用自定義代碼添加作者信息框
在這種方法中,您需要將代碼添加到您的網站。
首先,導航到“外觀 -> 主題編輯器”,然後點擊主題函數(functions.php)
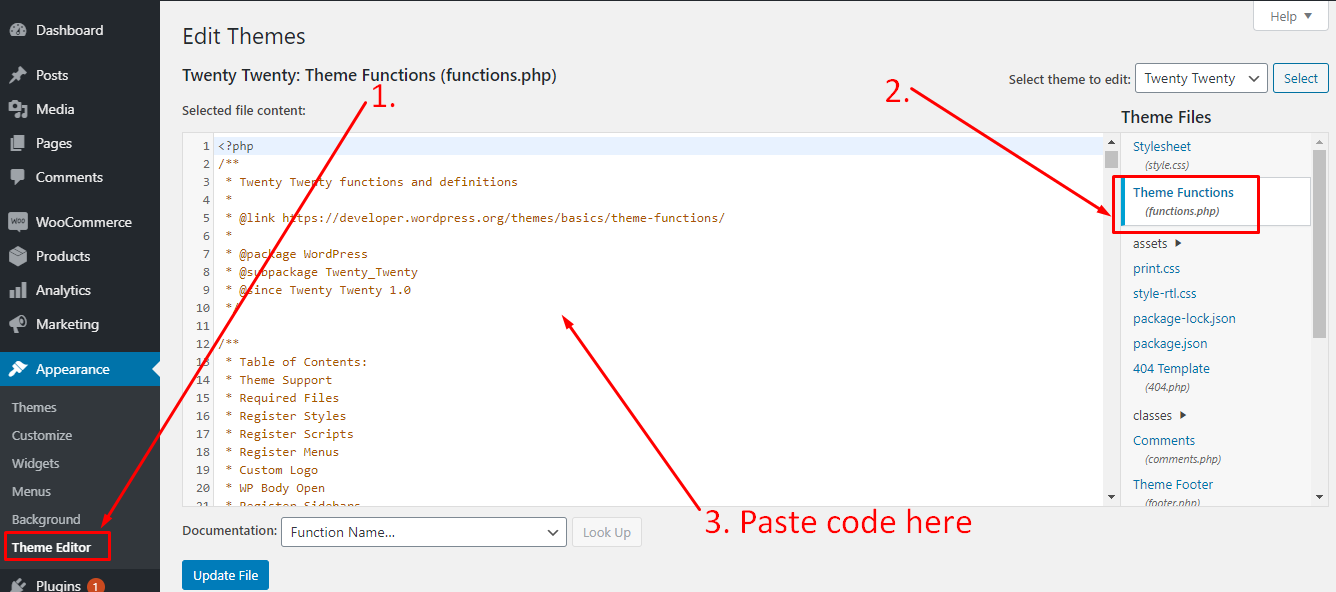
現在復制下面的代碼並將其粘貼到編輯器中。
function wpb_author_info_box( $content ) { global $post; // Detect if it is a single post with a post author if ( is_single() && isset( $post->post_author ) ) { // Get author's display name $display_name = get_the_author_meta( 'display_name', $post->post_author ); // If display name is not available then use nickname as display name if ( empty( $display_name ) ) $display_name = get_the_author_meta( 'nickname', $post->post_author ); // Get author's biographical information or description $user_description = get_the_author_meta( 'user_description', $post->post_author ); // Get author's website URL $user_website = get_the_author_meta('url', $post->post_author); // Get link to the author archive page $user_posts = get_author_posts_url( get_the_author_meta( 'ID' , $post->post_author)); if ( ! empty( $display_name ) ) $author_details = '<p class="author_name">About ' . $display_name . '</p>'; if ( ! empty( $user_description ) ) // Author avatar and bio $author_details .= '<p class="author_details">' . get_avatar( get_the_author_meta('user_email') , 90 ) . nl2br( $user_description ). '</p>'; $author_details .= '<p class="author_links"><a href="'. $user_posts .'">View all posts by ' . $display_name . '</a>'; // Check if author has a website in their profile if ( ! empty( $user_website ) ) { // Display author website link $author_details .= ' | <a href="' . $user_website .'" target="_blank" rel="nofollow">Website</a></p>'; } else { // if there is no author website then just close the paragraph $author_details .= '</p>'; } // Pass all this info to post content $content = $content . '<footer class="author_bio_section" >' . $author_details . '</footer>'; } return $content; } // Add our function to the post content filter add_action( 'the_content', 'wpb_author_info_box' ); // Allow HTML in author bio section remove_filter('pre_user_description', 'wp_filter_kses');不要忘記更新文件。 現在留下了信息框的樣式。
導航到外觀 -> 自定義,然後單擊附加 CSS
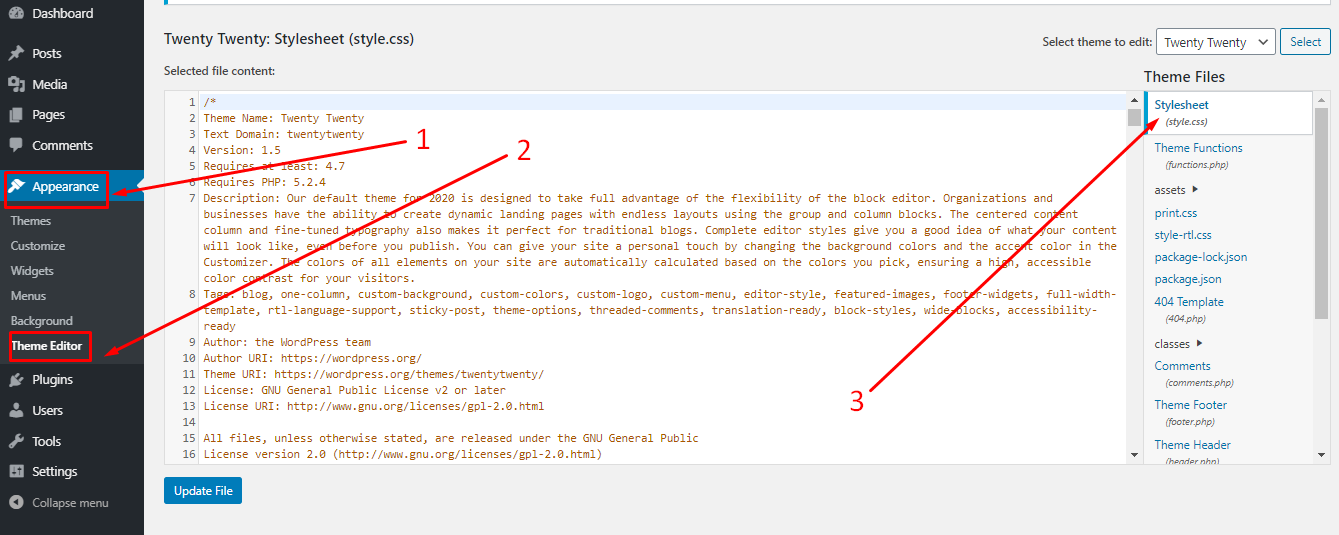
現在將以下代碼粘貼到編輯器中。
.author_bio_section{ background-color: #F5F5F5; padding: 15px; border: 1px solid #ccc; } .author_name{ font-size:16px; font-weight: bold; } .author_details img { border: 1px solid #D8D8D8; border-radius: 50%; float: left; margin: 0 10px 10px 0; }然後點擊上面的發布按鈕。 現在你得到了一個設計好的作者信息框。
最後的話
無論您在此處採用哪種方法,您都可以非常輕鬆地添加作者信息框。 如果您遇到任何問題,請毫不猶豫地詢問。 如果您喜歡這篇文章,請通過分享這篇文章來幫助我們。

一個插件來替換它們。
Ultimate Blocks 是一個免費的 Gutenberg Blocks 插件,有 18 個以上的塊。
