
如何在 WordPress 中添加作者信息框
已发表: 2021-11-18
您是否尝试通过在 WordPress 中添加作者信息框来显示您的作者信息? 作者信息框是一个小部分,可让您显示有关博客作者的信息并显示他们的社交媒体资料。
WordPress 中有几个主题可以让您在默认情况下轻松显示作者信息。 但是,您可能在某些主题中找不到它。
在这篇文章中,我将向您展示几种在 WordPress 中轻松添加作者信息框的方法。
让我们深入挖掘。
- 如何在 WordPress 中添加作者信息框
- 使用您的主题添加作者信息框
- 使用插件添加作者信息框
- 使用自定义代码添加作者信息框
- 最后的话
如何在 WordPress 中添加作者信息框
有几种方法可以在 WordPress 中添加作者信息框。 您可以使用您的主题、插件、自定义代码等添加作者信息框。这里我将向您展示三种方法。
使用您的主题添加作者信息框
许多 WordPress 主题在每篇文章下方都有一个作者信息框。 您可以使用此框显示作者的简历。
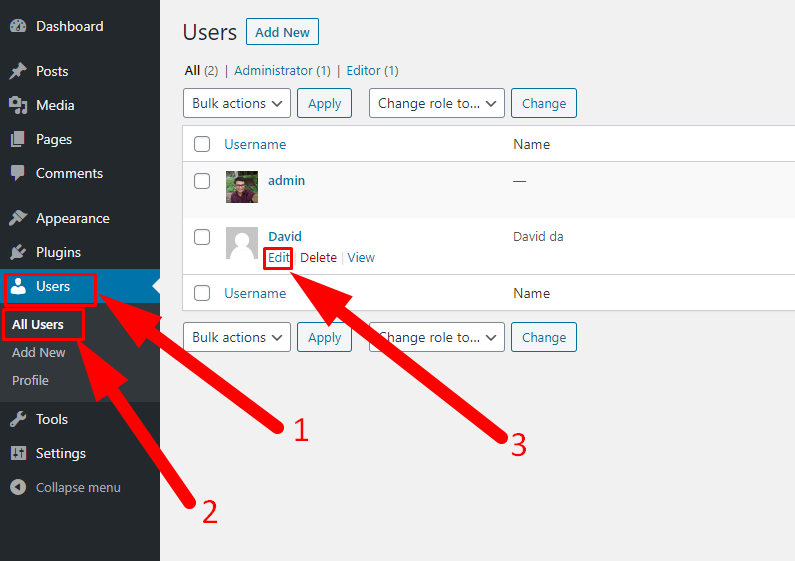
为此,请导航到用户 -> 所有用户页面。 现在单击用户的“编辑”按钮。
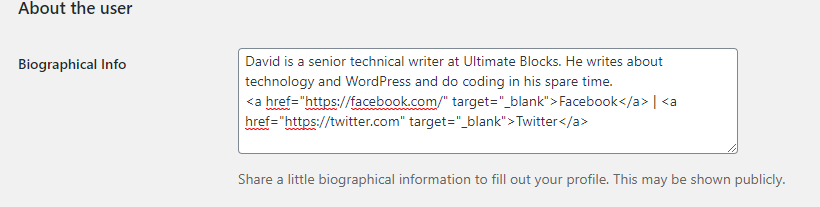
将打开一个新页面,向下滚动到“传记信息”部分。 在此部分中,添加作者的所有信息。 您还可以在此字段中添加 HTML 以添加链接。

如果作者没有头像,请告诉作者从 Gravatar 设置。 最后点击更新的用户,就可以在内容下方看到作者信息框了。
使用插件添加作者信息框
如果您使用的主题没有作者信息框,那么您可以使用此方法。 在这种方法中,您将需要一个名为 Author Bio Box 的插件。
安装并激活插件,然后进入设置 -> 作者生物框页面配置设置。
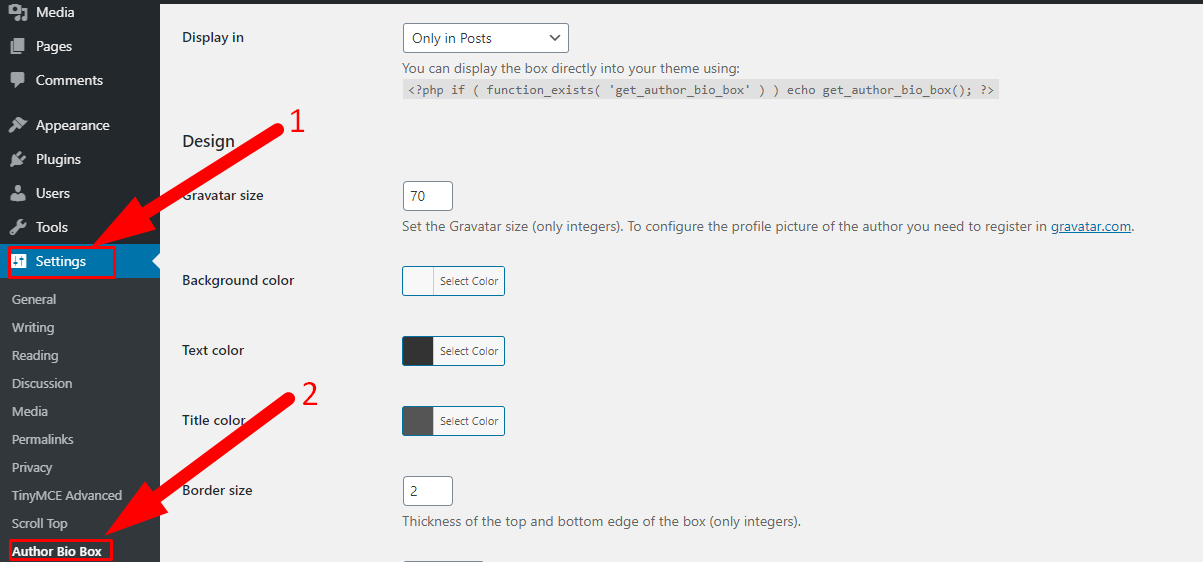
在此页面中,为作者信息框选择 gravatar 大小、颜色、位置并更改其他更改。 配置插件后,单击保存更改按钮。
现在转到用户 -> 所有用户页面,然后单击要更改的用户的“编辑”按钮。
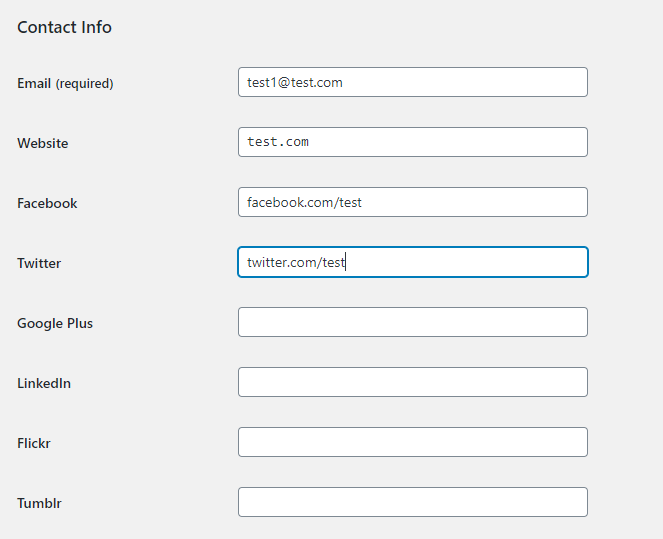
在这里,向下滚动到“联系信息”部分并添加作者的所有社交媒体个人资料链接。 该插件只会显示您输入 URL 的社交媒体的图标。
现在向下滚动到“传记信息”部分并在此处添加所有作者的信息。 您也可以在此处使用 HTML 添加链接。
现在单击更新用户按钮,您就完成了。
使用自定义代码添加作者信息框
在这种方法中,您需要将代码添加到您的网站。
首先,导航到“外观 -> 主题编辑器”,然后点击主题函数(functions.php)
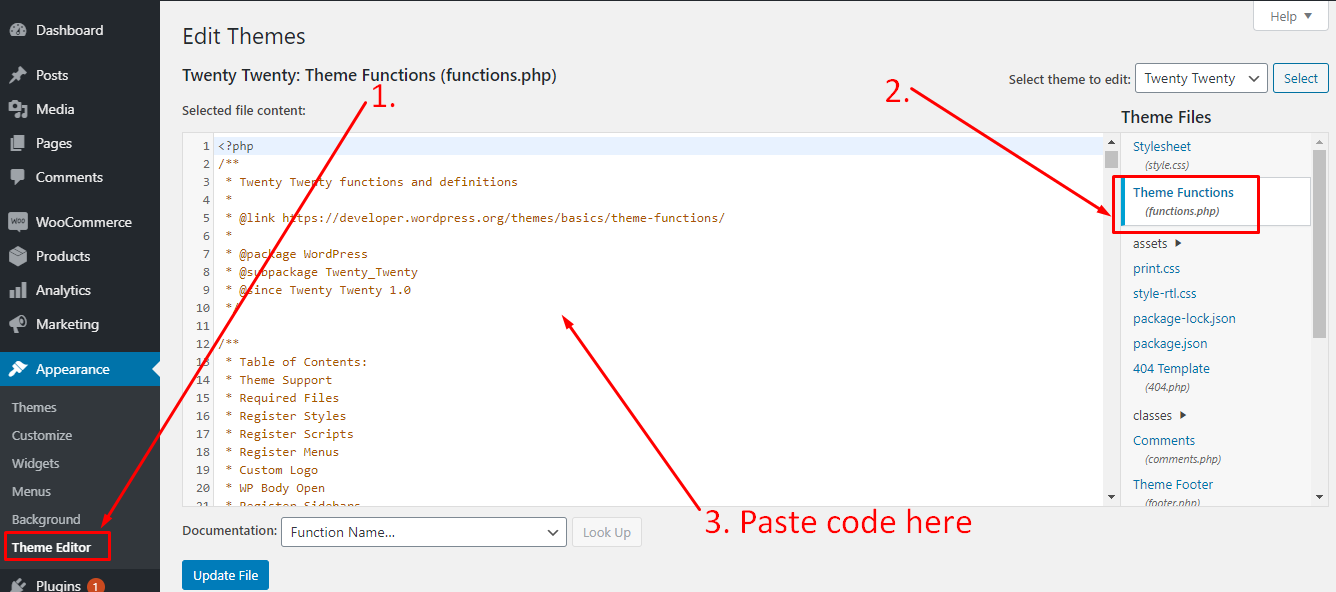
现在复制下面的代码并将其粘贴到编辑器中。
function wpb_author_info_box( $content ) { global $post; // Detect if it is a single post with a post author if ( is_single() && isset( $post->post_author ) ) { // Get author's display name $display_name = get_the_author_meta( 'display_name', $post->post_author ); // If display name is not available then use nickname as display name if ( empty( $display_name ) ) $display_name = get_the_author_meta( 'nickname', $post->post_author ); // Get author's biographical information or description $user_description = get_the_author_meta( 'user_description', $post->post_author ); // Get author's website URL $user_website = get_the_author_meta('url', $post->post_author); // Get link to the author archive page $user_posts = get_author_posts_url( get_the_author_meta( 'ID' , $post->post_author)); if ( ! empty( $display_name ) ) $author_details = '<p class="author_name">About ' . $display_name . '</p>'; if ( ! empty( $user_description ) ) // Author avatar and bio $author_details .= '<p class="author_details">' . get_avatar( get_the_author_meta('user_email') , 90 ) . nl2br( $user_description ). '</p>'; $author_details .= '<p class="author_links"><a href="'. $user_posts .'">View all posts by ' . $display_name . '</a>'; // Check if author has a website in their profile if ( ! empty( $user_website ) ) { // Display author website link $author_details .= ' | <a href="' . $user_website .'" target="_blank" rel="nofollow">Website</a></p>'; } else { // if there is no author website then just close the paragraph $author_details .= '</p>'; } // Pass all this info to post content $content = $content . '<footer class="author_bio_section" >' . $author_details . '</footer>'; } return $content; } // Add our function to the post content filter add_action( 'the_content', 'wpb_author_info_box' ); // Allow HTML in author bio section remove_filter('pre_user_description', 'wp_filter_kses');不要忘记更新文件。 现在留下了信息框的样式。
导航到外观 -> 自定义,然后单击附加 CSS
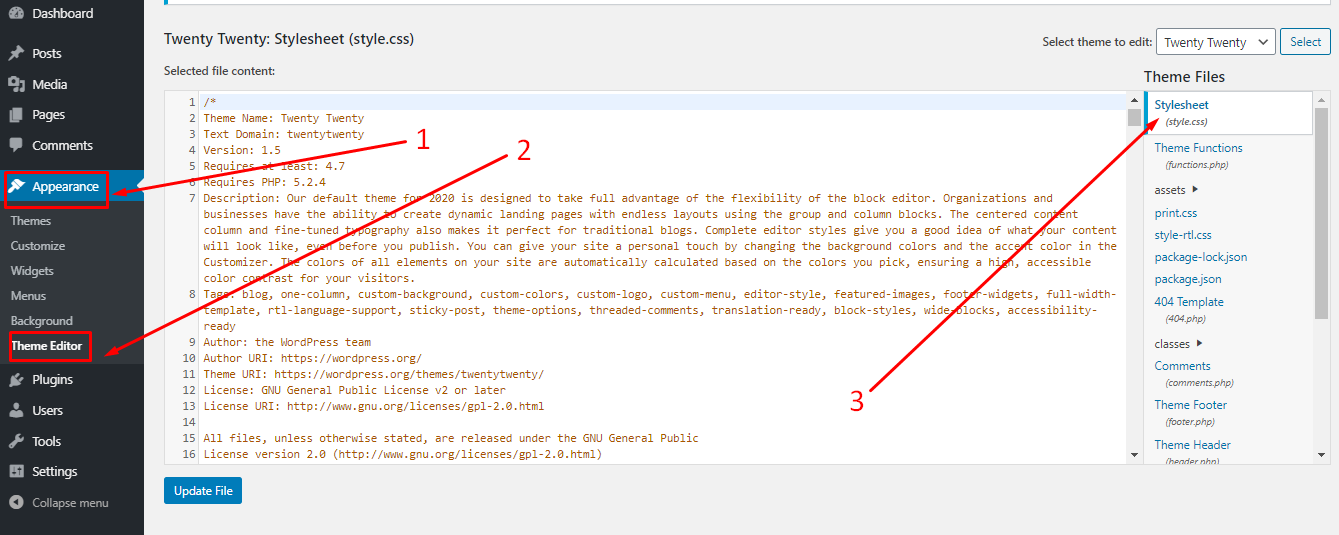
现在将以下代码粘贴到编辑器中。
.author_bio_section{ background-color: #F5F5F5; padding: 15px; border: 1px solid #ccc; } .author_name{ font-size:16px; font-weight: bold; } .author_details img { border: 1px solid #D8D8D8; border-radius: 50%; float: left; margin: 0 10px 10px 0; }然后点击上面的发布按钮。 现在你得到了一个设计好的作者信息框。
最后的话
无论您在此处采用哪种方法,您都可以非常轻松地添加作者信息框。 如果您遇到任何问题,请毫不犹豫地询问。 如果您喜欢这篇文章,请通过分享这篇文章来帮助我们。

一个插件来替换它们。
Ultimate Blocks 是一个免费的 Gutenberg Blocks 插件,有 18 个以上的块。
