
Как добавить раздел викторины MCQ с нумерацией страниц в Blogger и Wordpress
Опубликовано: 2024-03-23Если вы ищете сценарий викторины MCQ, то вы попали по адресу. В этой статье я покажу вам, как добавить адаптивный раздел викторин MCQ на свои веб-сайты Blogger и Wordpress.
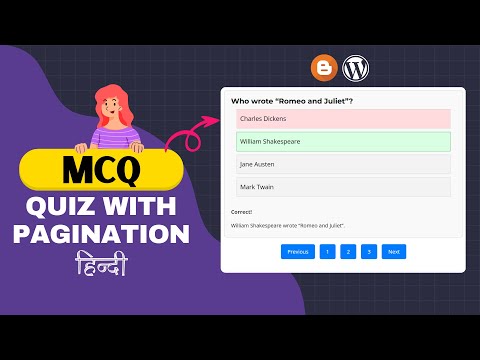
Когда вы запускаете веб-сайт викторины, вы хотите, чтобы ваша викторина была интересной и приносила пользу вашим читателям. Вот почему я разработал простой блок викторины с использованием HTML, CSS и Javascript, и здесь вы также получите функции нумерации страниц. Таким образом, пользователь может перемещаться между несколькими страницами с помощью кнопок «Предыдущая» и «Далее».
Таким образом, вы можете разместить множество вопросов в одном сообщении блога, не делая страницу слишком длинной, и сможете загружать больше тестов одним нажатием кнопки. Я также реализовал функцию, позволяющую отображать подробное объяснение ответа, когда пользователь нажимает на любой из вариантов.
Итак, давайте проверим, как можно добавить раздел «Викторина» на свои сайты Blogger и Wordpress.
Действия по добавлению раздела викторины MCQ с нумерацией страниц
Для этого вам необходимо использовать приведенный ниже фрагмент кода на своем веб-сайте. Если вы используете платформу Blogger CMS, отредактируйте сообщение в представлении HTML , а если вы используете Wordpress, вы можете использовать собственный блок HTML в редакторе Gutenberg.
Я рекомендую вам сначала посмотреть видео о том, как редактировать код и как добавить дополнительные вопросы и ответы MCQ на свой веб-сайт.
<div id="quiz-container"> <div class="question-container" data-page="1"> <h2 class="question">What is the capital of France?</h2> <div class="quiz-form"> <div class="option" data-answer="true">Paris</div> <!-- Correct Answer --> <div class="option" data-answer="false">Rome</div> <div class="option" data-answer="false">Berlin</div> <div class="option" data-answer="false">Madrid</div> </div> <div class="result"></div> <div class="explanation">Paris is the capital of France.</div> </div> <div class="question-container" data-page="1"> <h2 class="question">Who wrote "Romeo and Juliet"?</h2> <div class="quiz-form"> <div class="option" data-answer="false">Charles Dickens</div> <div class="option" data-answer="true">William Shakespeare</div> <!-- Correct Answer --> <div class="option" data-answer="false">Jane Austen</div> <div class="option" data-answer="false">Mark Twain</div> </div> <div class="result"></div> <div class="explanation">William Shakespeare wrote "Romeo and Juliet".</div> </div> <div class="question-container" data-page="2"> <h2 class="question">What does the abbreviation HTML stand for?</h2> <div class="quiz-form"> <div class="option" data-answer="false">HyperText Markup Language.</div> <div class="option" data-answer="true">HighText Markup Language.</div> <!-- Correct Answer --> <div class="option" data-answer="false">HyperText Markdown Language.</div> <div class="option" data-answer="false">None of the above.</div> </div> <div class="result"></div> <div class="explanation">HTML stands for HighText Markup Language.</div> </div> <!-- Add more Questions here --> </div> <div class="pagination"> <button id="prevButton">Previous</button> <button class="pageButton" data-page="1">1</button> <button class="pageButton" data-page="2">2</button> <!-- Add more page buttons as needed --> <button id="nextButton">Next</button> </div>CSS и Javascript-код

<style> .question-container { width: 100%; margin: auto; text-align: left; border: 1px solid #ccc; padding: 20px; border-radius: 10px; background-color: #f9f9f9; margin-bottom: 20px; } .quiz-form { display: flex; flex-direction: column; align-items: center; } .option { margin-bottom: 10px; padding: 10px; cursor: pointer; border: 1px solid #ccc; background: #f3f3f3; width:95%; } .option:hover { background-color: #fff; } .result { font-weight: bold; margin-top: 20px; } .explanation { margin-top: 10px; display: none; } /* Pagination button styling */ .pagination { margin-top: 20px; text-align: center; } .pagination button { background-color: #007bff; color: #fff; border: none; padding: 10px 20px; margin: 0 5px; border-radius: 5px; cursor: pointer; } .pagination button:hover { background-color: #0056b3; } </style> <script> document.addEventListener('DOMContentLoaded', function() { const questionContainers = document.querySelectorAll('.question-container'); questionContainers.forEach(function(container) { const options = container.querySelectorAll('.option'); const resultDisplay = container.querySelector('.result'); const explanationDisplay = container.querySelector('.explanation'); options.forEach(function(option) { option.addEventListener('click', function() { const selectedAnswer = option.getAttribute('data-answer'); const isCorrect = selectedAnswer === "true"; options.forEach(function(opt) { opt.style.border = '1px solid #ccc'; }); option.style.border = isCorrect ? '1px solid #28a745' : '1px solid #dc3545'; option.style.background = isCorrect ? '#d8ffe1' : '#ffdbde'; resultDisplay.textContent = isCorrect ? "Correct!" : "Wrong!"; explanationDisplay.style.display = "block"; }); }); }); }); document.addEventListener('DOMContentLoaded', function() { const questionContainers = document.querySelectorAll('.question-container'); let currentPageIndex = 1; // Track the current page index function showQuestionsForPage(pageIndex) { questionContainers.forEach(function(container, index) { if (container.dataset.page === pageIndex.toString()) { container.style.display = "block"; } else { container.style.display = "none"; } }); } showQuestionsForPage(currentPageIndex); const prevButton = document.getElementById('prevButton'); const nextButton = document.getElementById('nextButton'); const pageButtons = document.querySelectorAll('.pageButton'); prevButton.addEventListener('click', function() { if (currentPageIndex > 1) { currentPageIndex--; showQuestionsForPage(currentPageIndex); } }); nextButton.addEventListener('click', function() { if (currentPageIndex < questionContainers.length - 1) { currentPageIndex++; showQuestionsForPage(currentPageIndex); } }); pageButtons.forEach(function(button) { button.addEventListener('click', function() { currentPageIndex = parseInt(button.dataset.page); showQuestionsForPage(currentPageIndex); }); }); }); </script>Обратите внимание: если вы хотите использовать скрипт на всех страницах, вы можете напрямую использовать код CSS и javascript в коде своей темы, загружать его по всему сайту и использовать только HTML-код в сообщении блога.
Но я рекомендую использовать его непосредственно в сообщении в блоге, если вы используете тест только на ограниченных страницах.
Надеюсь, вы успешно добавили раздел викторины MCQ с разбивкой на страницы на своих веб-сайтах Blogger и Wordpress. Если у вас есть какие-либо сомнения, не стесняйтесь спрашивать в разделе комментариев.
Я также рекомендую вам ознакомиться с другими блоками викторин MCQ здесь.
- Как запустить сайт викторины в Blogger
- Как добавить MCQ на сайт WordPress