
如何为 WordPress 主题定制器创建自定义控件
已发表: 2015-06-17WordPress 主题定制器(也称为“定制器”)功能使开发人员能够定制其主题的外观,甚至帮助他们实时预览对主题所做的更改。 在当今时代,吸引客户访问网站的竞赛正在加剧,您经常会感到需要定制您的网站设计。 并且感谢主题定制器,您可以通过实时预览对 WordPress 设计所做的更改来节省大量宝贵的时间。

WordPress 主题定制器是作为主题定制 API 的一部分引入的(在 WordPress 版本 3.4 中引入。如果您想更改主题设置,那么您需要使用主题附带的自定义控件像复选框、文本字段、收音机和其他一些自定义工具。但是,如果您想将自己的自定义控件添加到您的 WordPress 主题中怎么办?
为了帮助您了解如何创建和添加定制以满足您的特定需求的控件,我们将演示如何创建三个自定义控件来对我们的主题页脚进行一些更改。 但是,要开始该过程,您首先需要熟悉 WP_Customizer_Control 类。
了解“WP_Customizer_Control”类
为了生成自定义控件,您需要创建一个新类并使用 WP_Customizer_Control 类对其进行扩展。 此类使用“$wp_customize->add_control()”方法将您自己的自定义控件添加到您的 WordPress 站点主题自定义屏幕。 此外,为了访问此方法,您需要使用操作挂钩中可用的 $wp_customize 对象:customize_register。
让我们考虑一个示例,说明如何将现有自定义控件添加到主题部分(在“customize_register”操作挂钩中),如下所示:
$wp_customize->add_control( new WP_Customize_Header_Image_ Control( $wp_customize, 'header_image', array( 'label' => __( 'Header image', 'mynewtheme' ), 'section' => 'header_image_settings', 'settings' => 'header_image_position', ) ) );$wp_customize->add_control( new WP_Customize_Header_Image_ Control( $wp_customize, 'header_image', array( 'label' => __( 'Header image', 'mynewtheme' ), 'section' => 'header_image_settings', 'settings' => 'header_image_position', ) ) );
在上面的示例中,我们正在创建一个控件,使用户能够选择新的标题图像。
示例演示:如何创建更多自定义控件?
本节分为三个不同的步骤,其中每个步骤都包含将为您的主题定制器的文本区域生成自定义控件的代码。 我们将在 WordPress 主题的 footer.php 文件中添加代码,以便通过新的文本区域控件对页脚进行更改。
Step1:创建一个简单的文本区域控件
正如我们上面所讨论的,为了创建一个新的自定义控件,我们需要定义一个用于扩展 WP_Customize_Control 类的类。 本质上,该类与 WordPress Theme Customization API 一起使用,用于在主题自定义屏幕上添加输入控件(即自定义控件)。 让我们看一下实现这个任务的代码:
/*Customizer Code HERE*/ add_action('customize_ register', 'theme_footer_customizer'); function theme_footer_customizer($wp_ customize){ //adding section in wordpress customizer $wp_customize->add_section(' footer_settings_section', array( 'title' => 'Footer Text Section' )); //adding setting for footer text area $wp_customize->add_setting(' text_setting', array( 'default' => 'Default Text For Footer Section', )); $wp_customize->add_control(' text_setting', array( 'label' => 'Footer Text Here', 'section' => 'footer_settings_section', 'type' => 'textarea', ));/*Customizer Code HERE*/ add_action('customize_ register', 'theme_footer_customizer'); function theme_footer_customizer($wp_ customize){ //adding section in wordpress customizer $wp_customize->add_section(' footer_settings_section', array( 'title' => 'Footer Text Section' )); //adding setting for footer text area $wp_customize->add_setting(' text_setting', array( 'default' => 'Default Text For Footer Section', )); $wp_customize->add_control(' text_setting', array( 'label' => 'Footer Text Here', 'section' => 'footer_settings_section', 'type' => 'textarea', ));
在这段代码中,customer_register 动作钩子用于告诉 WordPress 自定义函数,我们创建的名称为:theme_footer_customizer。 您可能知道,WP_Customize_Manager 类有助于控制 WordPress 主题定制器,因此自定义控件将成为该类的一部分。 但是,要访问您的控件,您需要使用“wp_customize”对象,它是 customize_register 挂钩的一个实例。

在我们的例子中, wp_customize 对象用于定义将包含在文本区域中的新页脚部分。 因此,无论您在页脚部分“文本区域”中键入什么内容,都将显示在主题的页脚中,如下面的屏幕截图所示:

在此屏幕截图中,您可以看到主题中添加了一个新的“页脚文本部分”。 本节中编写的文本将显示在主题的页脚中。
第 2 步:添加自定义控件以更改背景颜色
所以,现在我们已经创建了一个文本区域控件,您可以向它添加许多不同的自定义控件。 在此示例中,我们将向新的页脚文本部分添加一个自定义控件,这将有助于更改页脚的背景颜色。 为此,只需在主题的 footer.php 文件中添加以下代码片段:
//adding setting for background $wp_customize->add_setting(' background_color', array( 'default' => '#ffffff', ) ); $wp_customize->add_control( new WP_Customize_Color_Control( $wp_customize, 'background_color', array( 'label' => 'Footer Color Setting', 'section' => 'footer_settings_section', 'settings' => 'background_color', )));//adding setting for background $wp_customize->add_setting(' background_color', array( 'default' => '#ffffff', ) ); $wp_customize->add_control( new WP_Customize_Color_Control( $wp_customize, 'background_color', array( 'label' => 'Footer Color Setting', 'section' => 'footer_settings_section', 'settings' => 'background_color', )));
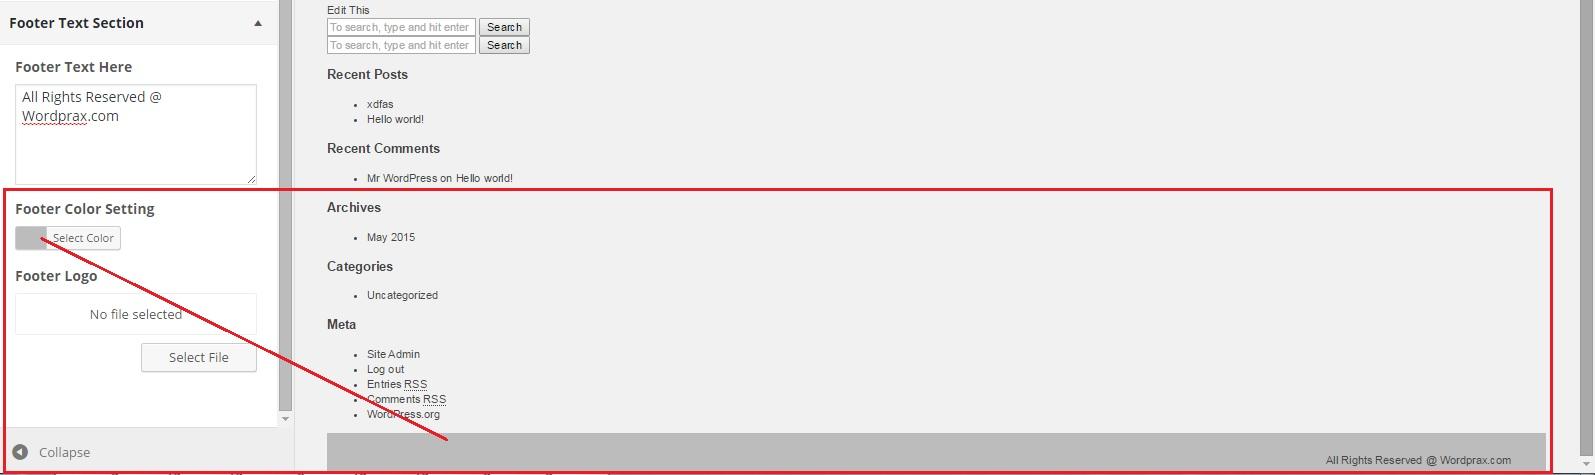
正如您在上面的屏幕截图中所看到的,从“页脚颜色设置”中选择合适的颜色,页脚的背景颜色已变为灰色。
第 3 步:添加自定义控件以添加徽标
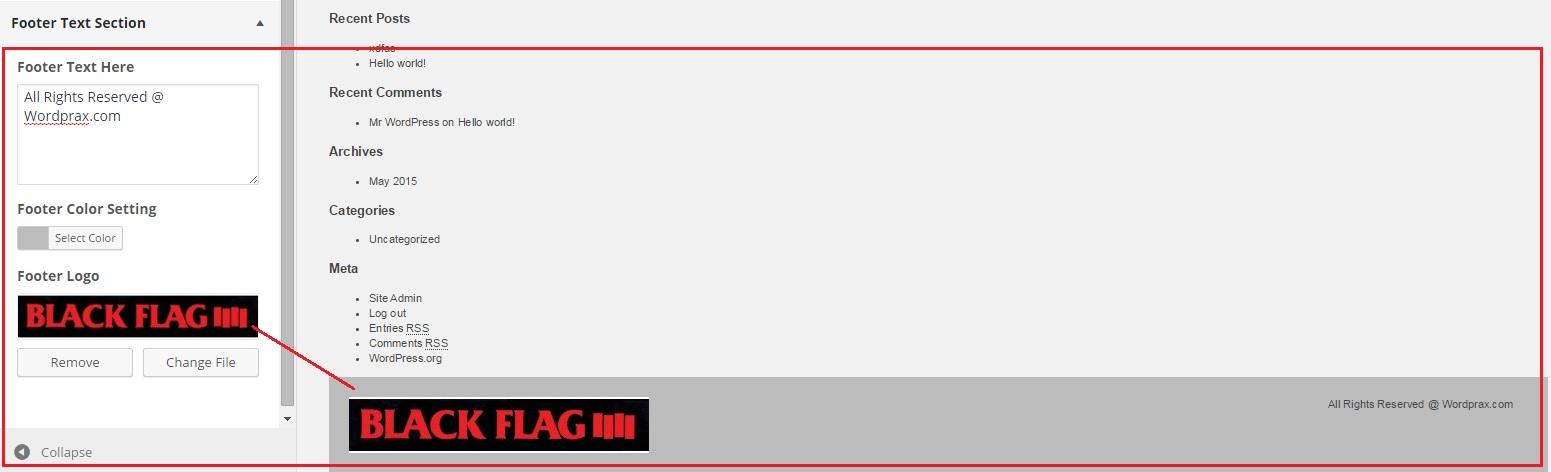
我们添加到页脚文本部分的另一个控件是“页脚徽标”。 顾名思义,“页脚徽标”控件将有助于在页脚中添加徽标。 要添加此控件,您需要在 footer.php 文件中包含以下代码片段:
//adding setting for footer logo $wp_customize->add_setting(' footer_logo'); $wp_customize->add_control(new WP_Customize_Upload_Control($ wp_customize,'footer_logo', array( 'label' => __('Footer Logo', 'mytheme'), 'section' => 'footer_settings_section', 'settings' => 'footer_logo', ))); }//adding setting for footer logo $wp_customize->add_setting(' footer_logo'); $wp_customize->add_control(new WP_Customize_Upload_Control($ wp_customize,'footer_logo', array( 'label' => __('Footer Logo', 'mytheme'), 'section' => 'footer_settings_section', 'settings' => 'footer_logo', ))); }
让我们结束吧!
您可能会发现创建自定义控件的过程有点耗时。 但是,您不能忽视这样一个事实,即您将添加到您的网站主题自定义屏幕的控件越好,您的用户可以节省更多的时间,从而提高用户体验。 因此,如果您计划自己构建一些自定义控件以添加到 WordPress 主题定制器中,那么这篇文章将为您提供丰富的指南。